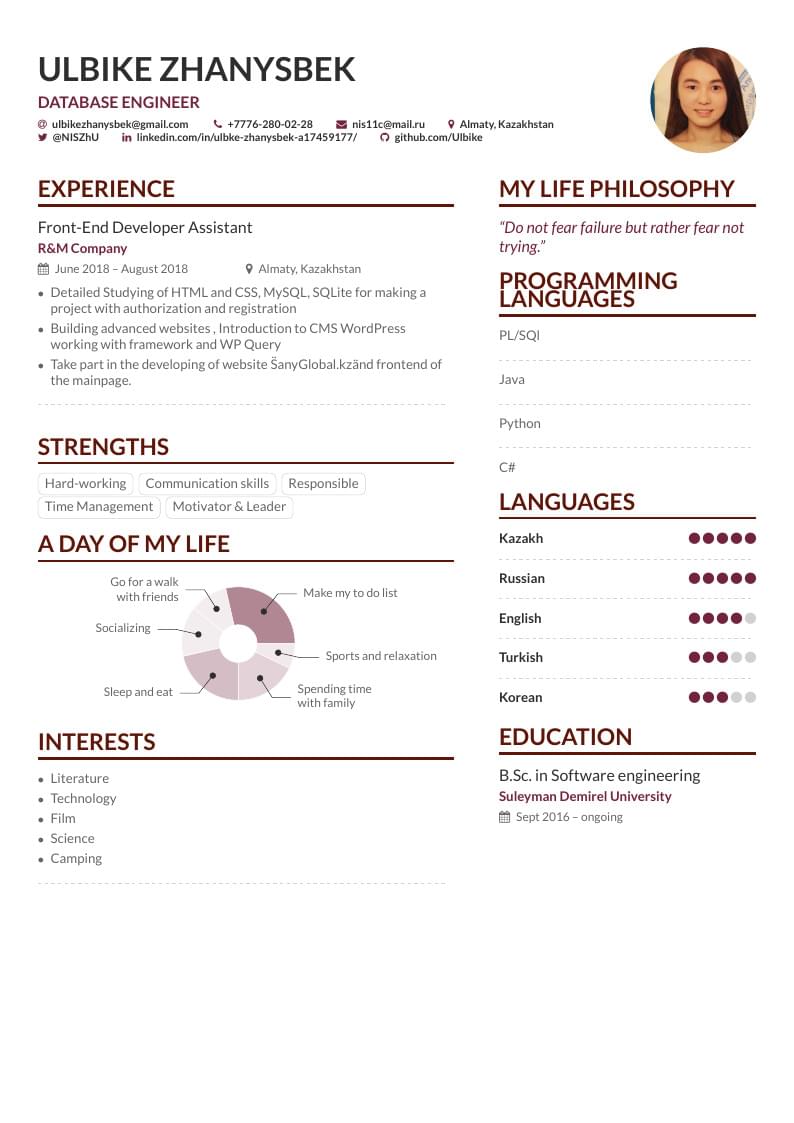
Zhanysbek Ulbike's CV
Author:
Ulbike
Last Updated:
7 лет назад
License:
Creative Commons CC BY 4.0
Аннотация:
Zhanysbek Ulbike's CV
Created with the AltaCV template

\begin
Discover why over 25 million people worldwide trust Overleaf with their work.
Zhanysbek Ulbike's CV
Created with the AltaCV template

\begin
Discover why over 25 million people worldwide trust Overleaf with their work.
%%%%%%%%%%%%%%%%%
% This is an sample CV template created using altacv.cls
% (v1.1.4, 27 July 2018) written by LianTze Lim (liantze@gmail.com). Now compiles with pdfLaTeX, XeLaTeX and LuaLaTeX.
%
%% It may be distributed and/or modified under the
%% conditions of the LaTeX Project Public License, either version 1.3
%% of this license or (at your option) any later version.
%% The latest version of this license is in
%%    http://www.latex-project.org/lppl.txt
%% and version 1.3 or later is part of all distributions of LaTeX
%% version 2003/12/01 or later.
%%%%%%%%%%%%%%%%

%% If you need to pass whatever options to xcolor
\PassOptionsToPackage{dvipsnames}{xcolor}

%% If you are using \orcid or academicons
%% icons, make sure you have the academicons
%% option here, and compile with XeLaTeX
%% or LuaLaTeX.
% \documentclass[10pt,a4paper,academicons]{altacv}

%% Use the "normalphoto" option if you want a normal photo instead of cropped to a circle
% \documentclass[10pt,a4paper,normalphoto]{altacv}

\documentclass[10pt,a4paper]{altacv}
%% AltaCV uses the fontawesome and academicon fonts
%% and packages.
%% See texdoc.net/pkg/fontawecome and http://texdoc.net/pkg/academicons for full list of symbols.
%%
%% Compile with LuaLaTeX for best results. If you
%% want to use XeLaTeX, you may need to install
%% Academicons.ttf in your operating system's font
%% folder.


% Change the page layout if you need to
\geometry{left=1cm,right=9cm,marginparwidth=6.8cm,marginparsep=1.2cm,top=1.25cm,bottom=1.25cm,footskip=2\baselineskip}

% Change the font if you want to.

% If using pdflatex:
\usepackage[T1]{fontenc}
\usepackage[utf8]{inputenc}
\usepackage[default]{lato}

% If using xelatex or lualatex:
% \setmainfont{Lato}

% Change the colours if you want to
\definecolor{Mulberry}{HTML}{72243D}
\definecolor{SlateGrey}{HTML}{2E2E2E}
\definecolor{LightGrey}{HTML}{666666}
\colorlet{heading}{Sepia}
\colorlet{accent}{Mulberry}
\colorlet{emphasis}{SlateGrey}
\colorlet{body}{LightGrey}

% Change the bullets for itemize and rating marker
% for \cvskill if you want to
\renewcommand{\itemmarker}{{\small\textbullet}}
\renewcommand{\ratingmarker}{\faCircle}
%% sample.bib contains your publications
\addbibresource{sample.bib}

\usepackage[colorlinks]{hyperref}

\begin{document}

\name{ULBIKE ZHANYSBEK}
\tagline{DATABASE ENGINEER }
\photo{2.8cm}{forcv}
\personalinfo{%
  % Not all of these are required!
  % You can add your own with \printinfo{symbol}{detail}
  \email{ulbikezhanysbek@gmail.com }
  \phone{+7776-280-02-28}
  \mailaddress{nis11c@mail.ru}
  \location{Almaty, Kazakhstan}
  \twitter{@NISZhU}
  \linkedin{linkedin.com/in/ulbke-zhanysbek-a17459177/}
  \github{github.com/Ulbike}
  %% You MUST add the academicons option to \documentclass, then compile with LuaLaTeX or XeLaTeX, if you want to use \orcid or other academicons commands.
%   \orcid{orcid.org/0000-0000-0000-0000}
}

%% Make the header extend all the way to the right, if you want.
\begin{fullwidth}
\makecvheader
\end{fullwidth}

%% Depending on your tastes, you may want to make fonts of itemize environments slightly smaller
% \AtBeginEnvironment{itemize}{\small}


%% Provide the file name containing the sidebar contents as an optional parameter to \cvsection.
%% You can always just use \marginpar{...} if you do
%% not need to align the top of the contents to any
%% \cvsection title in the "main" bar.
\cvsection[page1sidebar]{Experience}

\cvevent{Front-End Developer Assistant}{R\&M Company}{June 2018 -- August 2018}{Almaty, Kazakhstan}
\begin{itemize}
\item Detailed Studying of HTML and CSS, MySQL, SQLite for making a project with authorization and registration

\item Building advanced websites , Introduction to CMS WordPress working with framework and WP Query

\item Take part in the developing of website \"SanyGlobal.kz\" and frontend of the mainpage.
\end{itemize}

\divider
\medskip


\cvsection{Strengths}

\cvtag{Hard-working}
\cvtag{Communication skills}
\cvtag{Responsible}\
\cvtag{Time Management}
\cvtag{Motivator \& Leader}


\cvsection{A Day of My Life}

% Adapted from @Jake's answer from http://tex.stackexchange.com/a/82729/226
% \wheelchart{outer radius}{inner radius}{
% comma-separated list of value/text width/color/detail}
\wheelchart{1.5cm}{0.5cm}{%
  6/8em/accent!30/{Sleep and eat},
  4/8em/accent!8/{Socializing},
  3/7em/accent!8/Go for a walk with friends,
  8/8em/accent!55/Make my to do list,
  2/10em/accent!10/Sports and relaxation,
  5/6em/accent!20/Spending time with family
}

\cvsection{Interests}

\begin{itemize}
\item Literature

\item Technology

\item Film

\item Science

\item Camping
\end{itemize}

\divider

\medskip

\clearpage


%% If the NEXT page doesn't start with a \cvsection but you'd
%% still like to add a sidebar, then use this command on THIS
%% page to add it. The optional argument lets you pull up the
%% sidebar a bit so that it looks aligned with the top of the
%% main column.
% \addnextpagesidebar[-1ex]{page3sidebar}

\end{document}